Sun Tune Tachometer Wiring Diagram

Ignition Switch Troubleshooting Wiring Diagrams With Images
Ford Ranger Tachometer Install
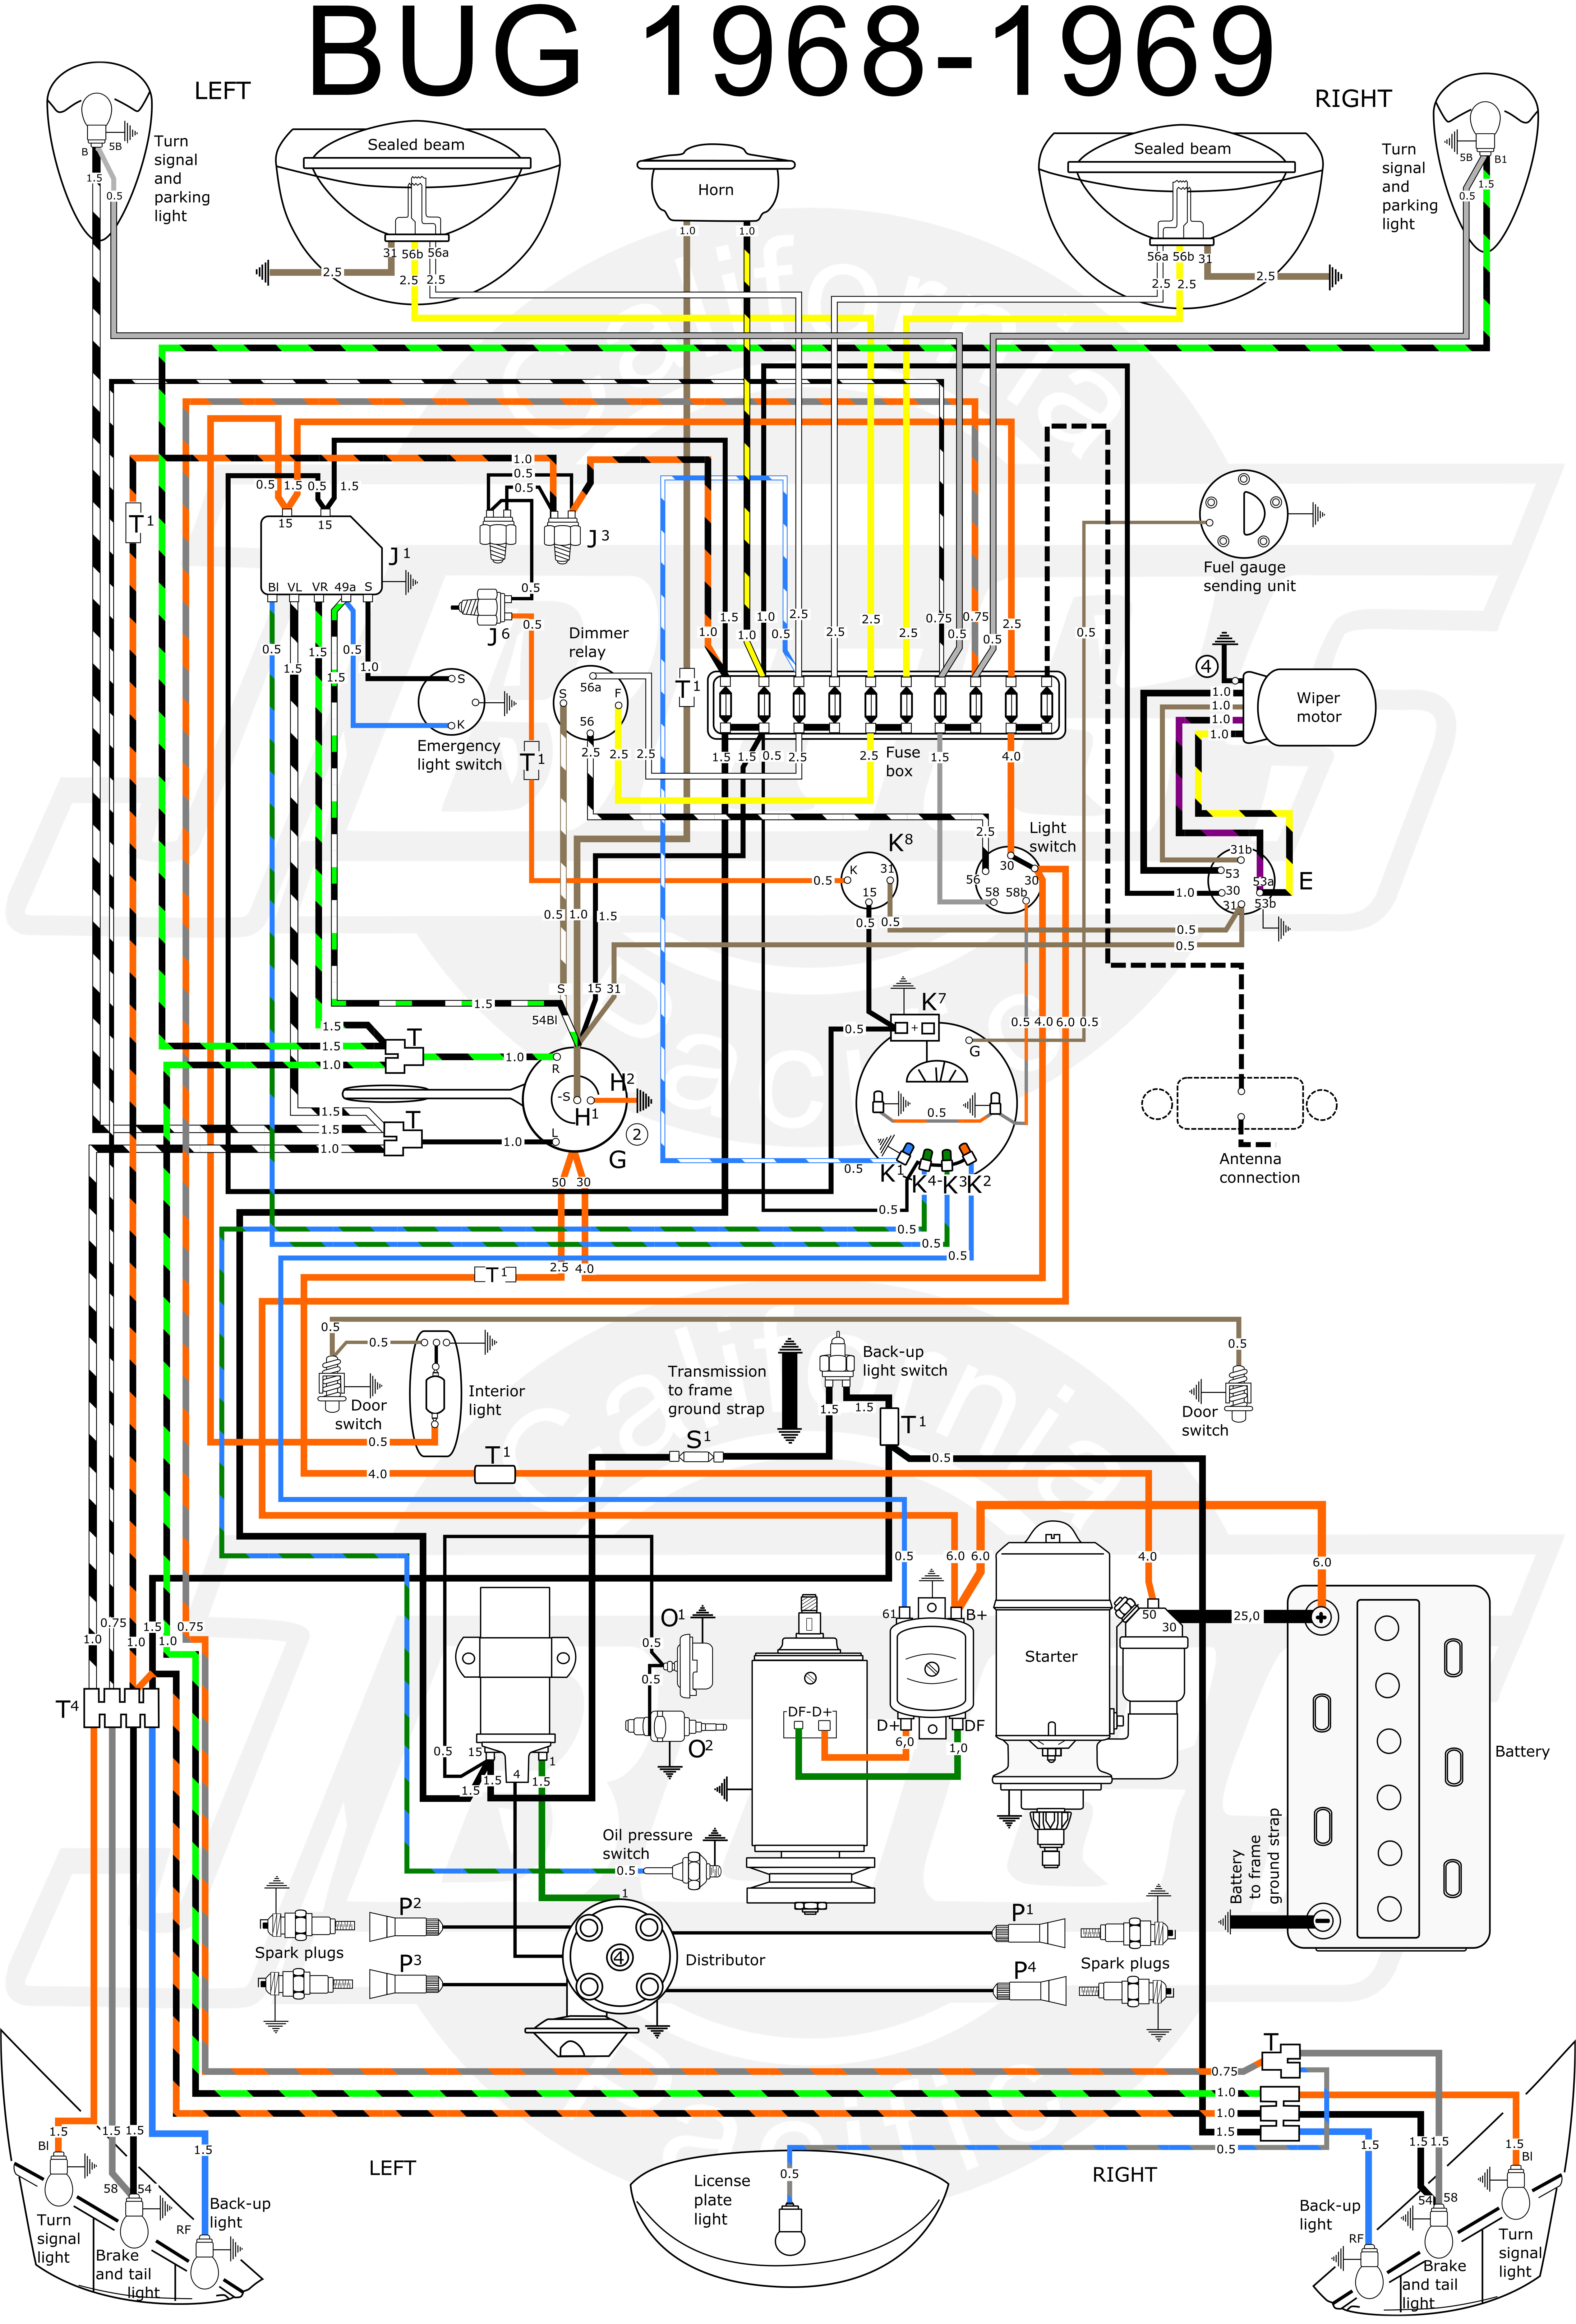
Vw Tech Article 1968 69 Wiring Diagram
My Multi Output Megasquirt Wiring Diagram E3tc E30 Performance

Antenna Chart Ham Radio Antenna Ham Radio Shortwave Radio

Tach It Up Remember Sun Tachometers Racingjunk News

Here is a picture gallery about sun super tach 2 wiring diagram complete with the description of the image please find the image you need.
Sun tune tachometer wiring diagram. Articles and pictorials. Meets the 21st century. It was impossible to avoid ads for sun tachometers in virtually every automobile related publication. Separate the wires that will be connected inside the passenger cabin and those that will run into the engine compartment through the firewall.
The pointer will move to a. Simple tach install for hei distributor re upload syrus54. Proceed to tachometer signal hookup. Apply power to the tach by turning the ignition key to the accessory or on position.
12 ebay tachometer wiring diagram explained. It s important to make sure you ve got the correct wire for the tachometer which means you might need to use a multimeter with a tach setting to test the wires correctly and. Do not start the engine. Here is a picture gallery about sun super tach 2 wiring diagram complete with the description of the image please find the image you need.
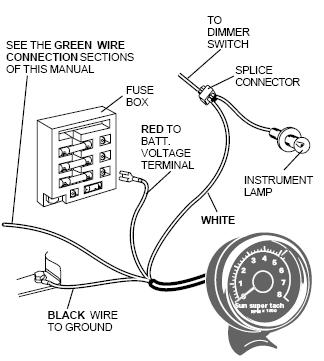
To change the ppr on tachs with three buttons follow the steps below. Use tie wraps to secure the tachometer wires to the body of the car. Sunpro is a maker of gauges and tachometers and has been producing these devices since the tachometer grew in popularity in the s and s with the rise of sport and muscle cars. Connect the white wire to the instrument panel lighting circuit connected to the dimmer control switch.
The tachometer is configured at the factory for 4 ppr. Connect the white wire to the dimmer switch control wire by using a wire splice. Run the tachometer wiring around or through the dash board down to the firewall behind the gas pedal. Connect the tachometer s lighting white wire to the instrument panel light circuit consult vehicle s repair manual for wiring diagrams.
It s no secret that the legendary sun tachometer was an absolute requirement for any muscle car owner or wannabe muscle car owner in the 50 s 60 s 70 s and beyond. Insert the dimmer switch wire into one side of the splice and the white wire coming from the tachometer into the other side. To install the light bulbs use needle nose pliers to insert the bulb in the bulb receptacle on back of gauge then twist clockwise turn to lock into place. With no power applied to the tach press and hold the set button.

Yv 4789 Together With Boat Tachometer Wiring Diagram Further Boat

1955 One Transistor Regen Using Ck722 Onetuberadio Com First

Sun Tune Tachometer Wiring Wiring Diagram

Simple Metal Detector Circuit With Applications Electronic
Https Www Altorfer Com Wp Content Uploads 2017 10 Lebe0007 04 Emcp4 4 Ai Guide Pdf

Pin On Electronics Circuits

Sun Tune Tachometer Wiring Diagram Wiring Diagram

How To Connect And Use Analog Joystick With Arduino Avec Images

Griffin Itrip Auto Universal Plus Refresh Fm Transmitter And

Homemade Leak Down Tester Homemadetools Net With Images

Image Result For Floor Control Valve Assembly With Images
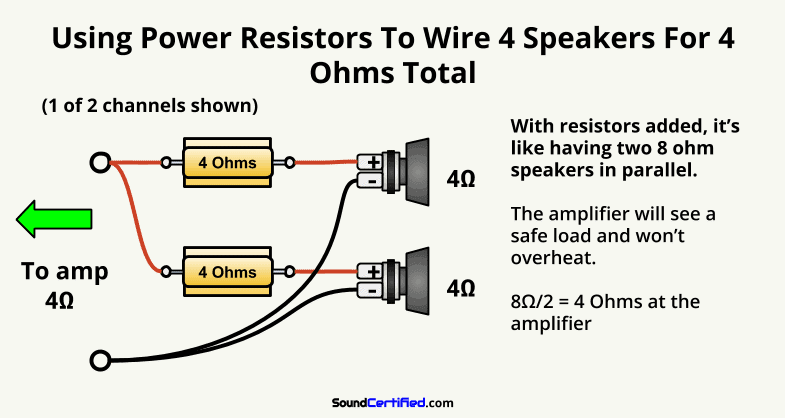
How To Wire A 4 Channel Amp To 4 Speakers And A Sub A Detailed

Conveyor Belt Controller With Images Conveyor Belt Circuit
